Pear Deck for Learning and Assessment

Wednesday, January 4, 2023 No comments

Have you used Pear Deck yet? As part of my master's program, I choose Pear Deck for one of my assignments and just had to share with you how easy it is to use Pear Deck for learning and assessment in your classroom. Bringing technology into the classroom can provide a learner-center environment, provide authentic assessment, and meet the needs of diverse learners in the classroom. 

What is Pear Deck? Pear Deck is an add-on tool that works with Google Slides. Teachers can create a lesson in a slide deck and add Pear Deck to initiate interactions in real-time. I used an ELA lesson on characters, setting, and plot, and explain the sequence of events using a realistic fiction story.   

Let's get started!

Teachers can access Pear Deck to add to their lessons in Google Slides. Teachers will open their lesson and then go to Add-ons, Pear Deck for Google Slides, and Open Pear Deck.

2.     Once Pear Deck is open teachers can add interactive slides from Pear Deck’s template library or create their own activity slide from the Ask students a question. 

 Once the teacher has found the interactive slide that works best, they can add it to their slide deck. The teacher can edit the text, change multiple-choice answers, add text boxes, and rename draggable pieces.


 After the lesson is complete and the teacher has added all interactive Pear Deck slides teachers can then embed the lesson into Schoology for the students to access by following these steps.


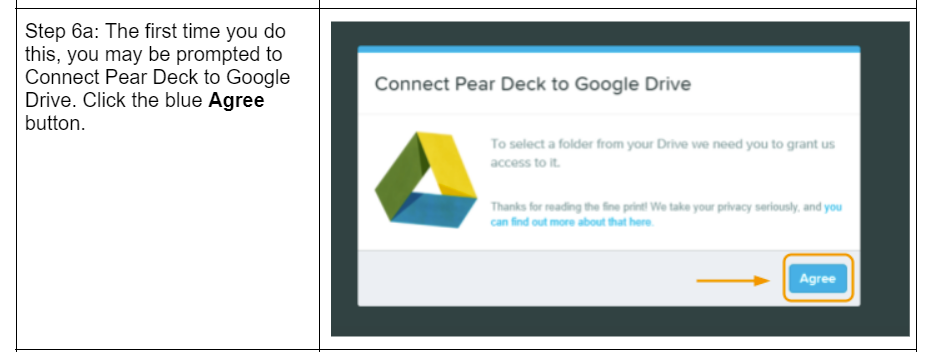


After the lesson is embedded in Schoology students can access it in Schoology, click on the tool, and immediately begin the lesson. When they are in the lesson the teacher can open their dashboard and see live feedback during the lesson and be able to provide feedback to the students as well.


I hope these steps help you. Please reach out with any questions and I would love to hear about what you created in Pear Deck for your classroom! Check back soon for a Pear Deck on math that you can use in your classroom! 

2022 - 2023 School Year Calendar

Monday, June 20, 2022 No comments

Back by popular demand - many of you loved my calendar last year and thank you all for supporting my store!

If you are looking for a cute calendar to keep yourself organized for this year's school year look no further! This cute July 2022 - June 2023 calendar is a great way to keep birthdays, PD days, meetings, conferences, breaks, and more organized. Many of my followers use this to send home to parents to keep them informed on school events, assignment due dates, and days where there is no school or early releases. 

Head over to my store to grab it HERE


Free Calendar for the 2022-2023 School Year

Wednesday, June 15, 2022 No comments

 Go grab my FREE calendar to keep all your important dates and reminders for the school year in one place! This super simple rainbow calendar includes 12 months from July 2022 to June 2023. Here's to a great 2022-2023 school year!! 


Head on over to my TPT store HERE to download the calendar! 


Christmas Gifts For My Students!!

Sunday, November 28, 2021 No comments

I was very productive over the much needed Thanksgiving Break! I needed an inexpensive gift for my students. I love giving personalized gifts so why not give a personalized gift to each student. I decided to make ornaments made out of their name. I have been dying to try cutting some other materials on my Silhouette machine so why not try craft foam! 

Amazon to the rescue! I ordered craft foam that had the adhesive backing on it thinking it would be easier. Ha! Nope! I knew that I was going to have to cut the name the right way and then flip the name horizontal so that both sides would be glittery and read their name. I also order the 2mm craft blade on Amazon to cut the foam. A trip to Hobby Lobby scored me the hooks and the little holiday themed charms I wanted to attach to the names. 

In the design studio, I used my name for my first attempt. When I went to send it to the machine all these little squiggly lines showed up on the mat! What?? After some googling and YouTube searching I found nothing but did learn that the kraft blade does not turn like the auto blade as only one side of the blade is used to cut. I finally figured out this is how the machine turns the blade so the sharp edge of the blade is cutting. So if you have never used the kraft blade before let me save you the worry when you see this.....


I cut my name forward and backwards, pulled the mat out and.......nope no cut! When I finally found a setting that worked (I still had to work at the name to pop it out as it still did not cut all the way thru the foam) I had both cuts and popped them out. I pulled the backing off and then attempted to attach the two names together. DISASTER! That adhesive is really sticky and I found the flexibility of the foam didn't really give me room for errors in matching them up correctly! 

So back to Amazon to order craft foam with no adhesive. Once I got that I was off and running. I found the perfect setting. When you choose craft foam, bump the force up to 27 and do 4 passes. This is what I found did the trick. I still had to pop out the name from the material but it was simple. 


Once I got all the names cut forward and backwards it was time to glue. I ended up running up to Hobby Lobby again to get craft glue because, of course, mine was dried out! I choose to try the clear gel tacky glue because you can't go wrong with clear glue! It worked great. I let them dry overnight.


The last thing to do was dress it up with a cute charm and a swirly hook. I loved how they came out! Hope the students love them too! 


Wonders 5th Grade Packets

Sunday, August 1, 2021 No comments

 We use Wonders for our ELA curriculum. There is A LOT of stuff in this program. We use some of it and some of it we don't. I wanted to create a packet for my students that focuses on the parts of the curriculum that we do use.


We focus on the first story in each week. If time allows we try to fit in the second story. My district does not require any spelling requirements. So I took out the weekly spelling words. This cover is what we cover - essential question, genre, vocab words and strategy and a comprehension skill. Ever week for every unit has this cover page. 


The next two pages relate to the story we read. We will cover the essential question, the vocabulary and comprehension strategy, and the genre. 


The next two pages works with the vocabulary in the week. Students will have to use 3 words in their own sentence and then each week has a vocabulary practice sheet. 


The next part in this packet is the grammar practice. I have separated the grammar rules page and the practice page. Students will put their rules page in their writing binder as we complete them to help when they are writing. I also tie in a grammar interactive notebook page that correlates with the grammar rule we are learning.


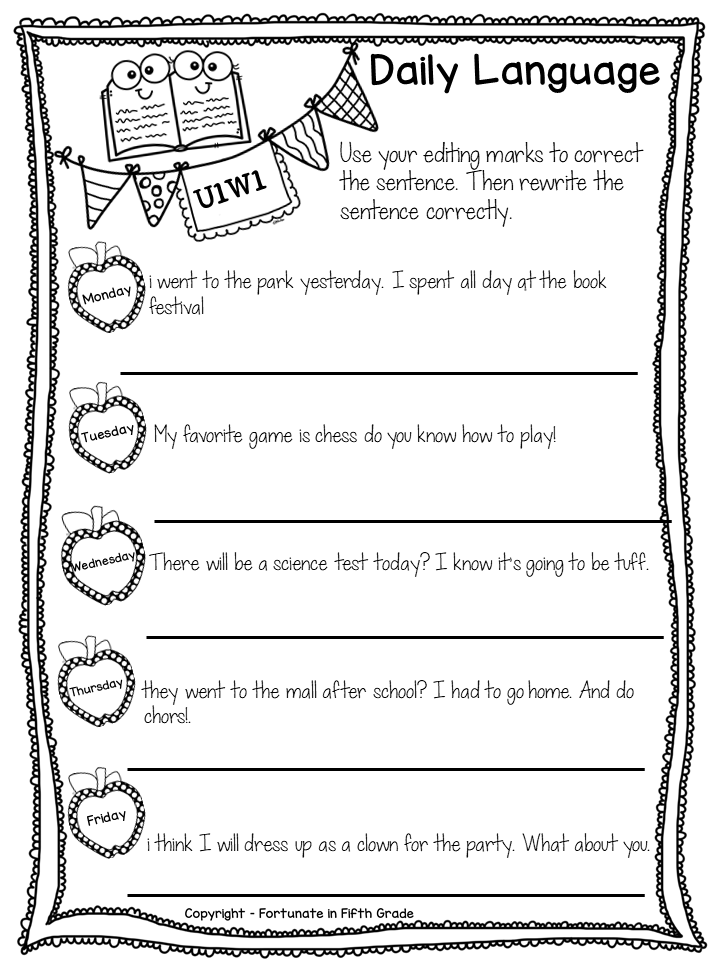
The last page of this packet is the daily language page. As they learn the strategies they will use them to find the errors in the sentence. I also teach editing marks and require the students to mark up the sentence then rewrite it. This could be used as morning work too. 


Of course all units come with answer keys too! I know not all teachers use wonders so I have separated out the vocabulary, grammar, and daily language as stand alone products too. Head on over to the store to grab the bundle. If you would like to try before you buy Unit 1 Week 1 is free in my store.